Juggling multiple social media accounts gets messy quickly.
Bouncing between apps, resizing content, and chasing down approvals takes time and energy, especially if you’re handling content for different brands, platforms, or clients.
If you’ve been struggling to keep your content organized, post consistently, or collaborate with your team, you need a more structured workflow and the right tools to support it.
Let’s break down a structured workflow to centralize account management, reduce manual work, and improve performance tracking across platforms.
What is a social media management tool?
A social media management tool allows you to manage multiple accounts from a single interface.
Think about how much time you lose jumping between Twitter, LinkedIn, Instagram, and Facebook just to post the same campaign. A good management tool reduces the need to switch between platforms. You plan, schedule, and publish from one place across multiple platforms.
Most tools go further than just scheduling, too. You get team collaboration features so your writers, designers, and approvers don’t email drafts back and forth. Approval workflows keep everything moving without the chaos. And basic analytics give you a read on what’s actually working, without needing a separate reporting tool.
(Some tools do analytics better than others. Worth checking before you commit.)
- Test it for 7 days for free
- Access all premium features during trial
- Spy on your competitors
Why use a social media management workflow?
Managing multiple accounts manually becomes inefficient as you scale.
A good social media management platform helps you connect accounts from:
- Google My Business
- X (formerly Twitter)
- WordPress
- Telegram
- YouTube
- Threads
- Medium
- Tumblr
- TikTok
Once connected, you can organize accounts into groups and categories and assign posting tasks to team members. (Without giving them full access to your social media profiles.)
When it comes to building social media posts, you’ve got options:
- Upload photos or videos straight from your computer, drop in a URL, or import media from external sources.
- You can edit visuals, adjust formats, and prepare media for each platform before publishing.
For planning, use the content calendar and scheduling feature to set exact times for each post or build a weekly content schedule. You can save drafts, make edits, or duplicate posts to reuse across different accounts. To stay organized, use tags, labels, or categories depending on your tool.
And when you’re ready to publish, you can send a single post to multiple accounts at once (where supported). Great for cross-posting and saving time. More on this below.
Here’s how to get started:
Step 1: Set Up All Accounts in One Place
When you set up your social media management tool, you’ll connect your social media accounts.
Most tools support major platforms such as Facebook, Instagram, LinkedIn, TikTok, and X, as well as other channels depending on the platform.
Follow the prompts to connect each account.

Once everything is linked, you can manage all campaigns from one dashboard and switch between accounts without leaving the platform. (If you’re an agency or freelancer, most tools let you manage multiple client accounts from one dashboard. Some even let you segment audiences to sharpen your targeting and boost engagement.)
To collaborate with your social media team, choose who can post and schedule. You and your team members can also share updates about posts and feeds and request changes as needed.
If you’re in charge of many clients or accounts, divide them into folders to make them easier to see and manage.
You can then create fresh content for each account, schedule posts, and engage with their target audience — all from one place, without needing direct access to their social profiles.
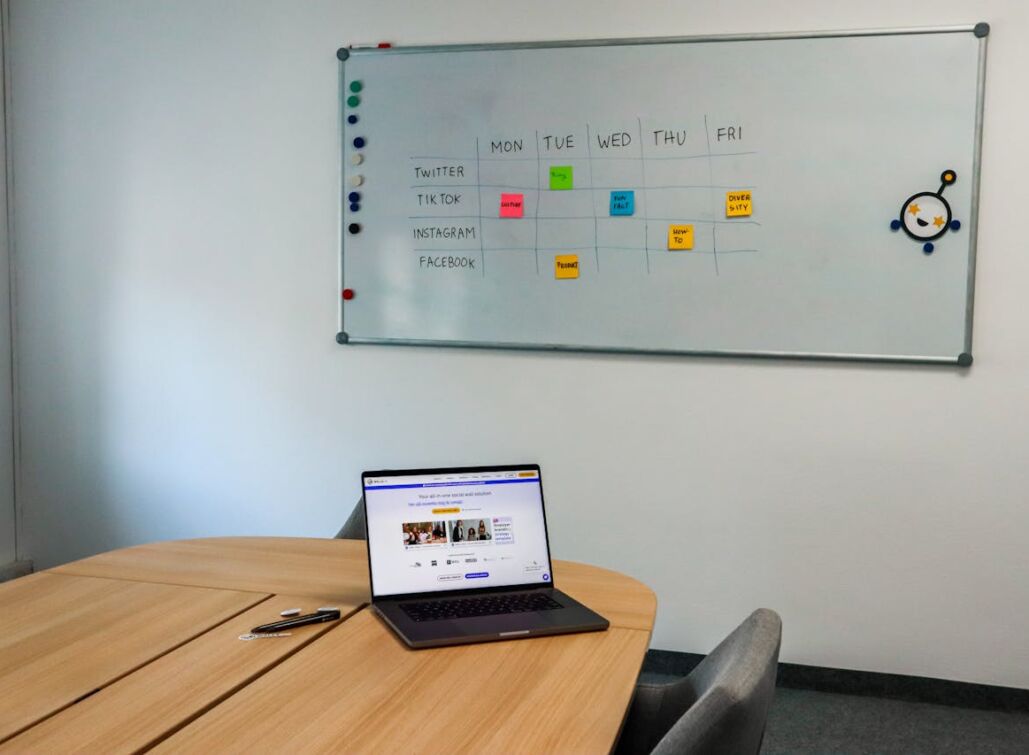
Step 2: Plan a Posting Schedule
Map out your posts for the week or month for each social platform you’re using in a Google doc or spreadsheet. You can also use your tool’s calendar and scheduling features.
Managing multiple social media accounts efficiently isn’t just about scheduling; it also requires maintaining momentum across platforms.
New or underperforming profiles often struggle to gain traction, which is why many marketers initially focus on getting more Instagram followers through services like Superviral to establish baseline credibility and improve early visibility.
Once that foundation is in place, it becomes easier to focus on consistent posting and long-term performance.
Stick to a consistent posting schedule so content continues going out, even when your team is busy.
Use your tool’s scheduling feature when you’re ready. Select the date and time for each post to go live, and repeat this process for each of your accounts. You can also schedule on mobile if you’re away from your computer.
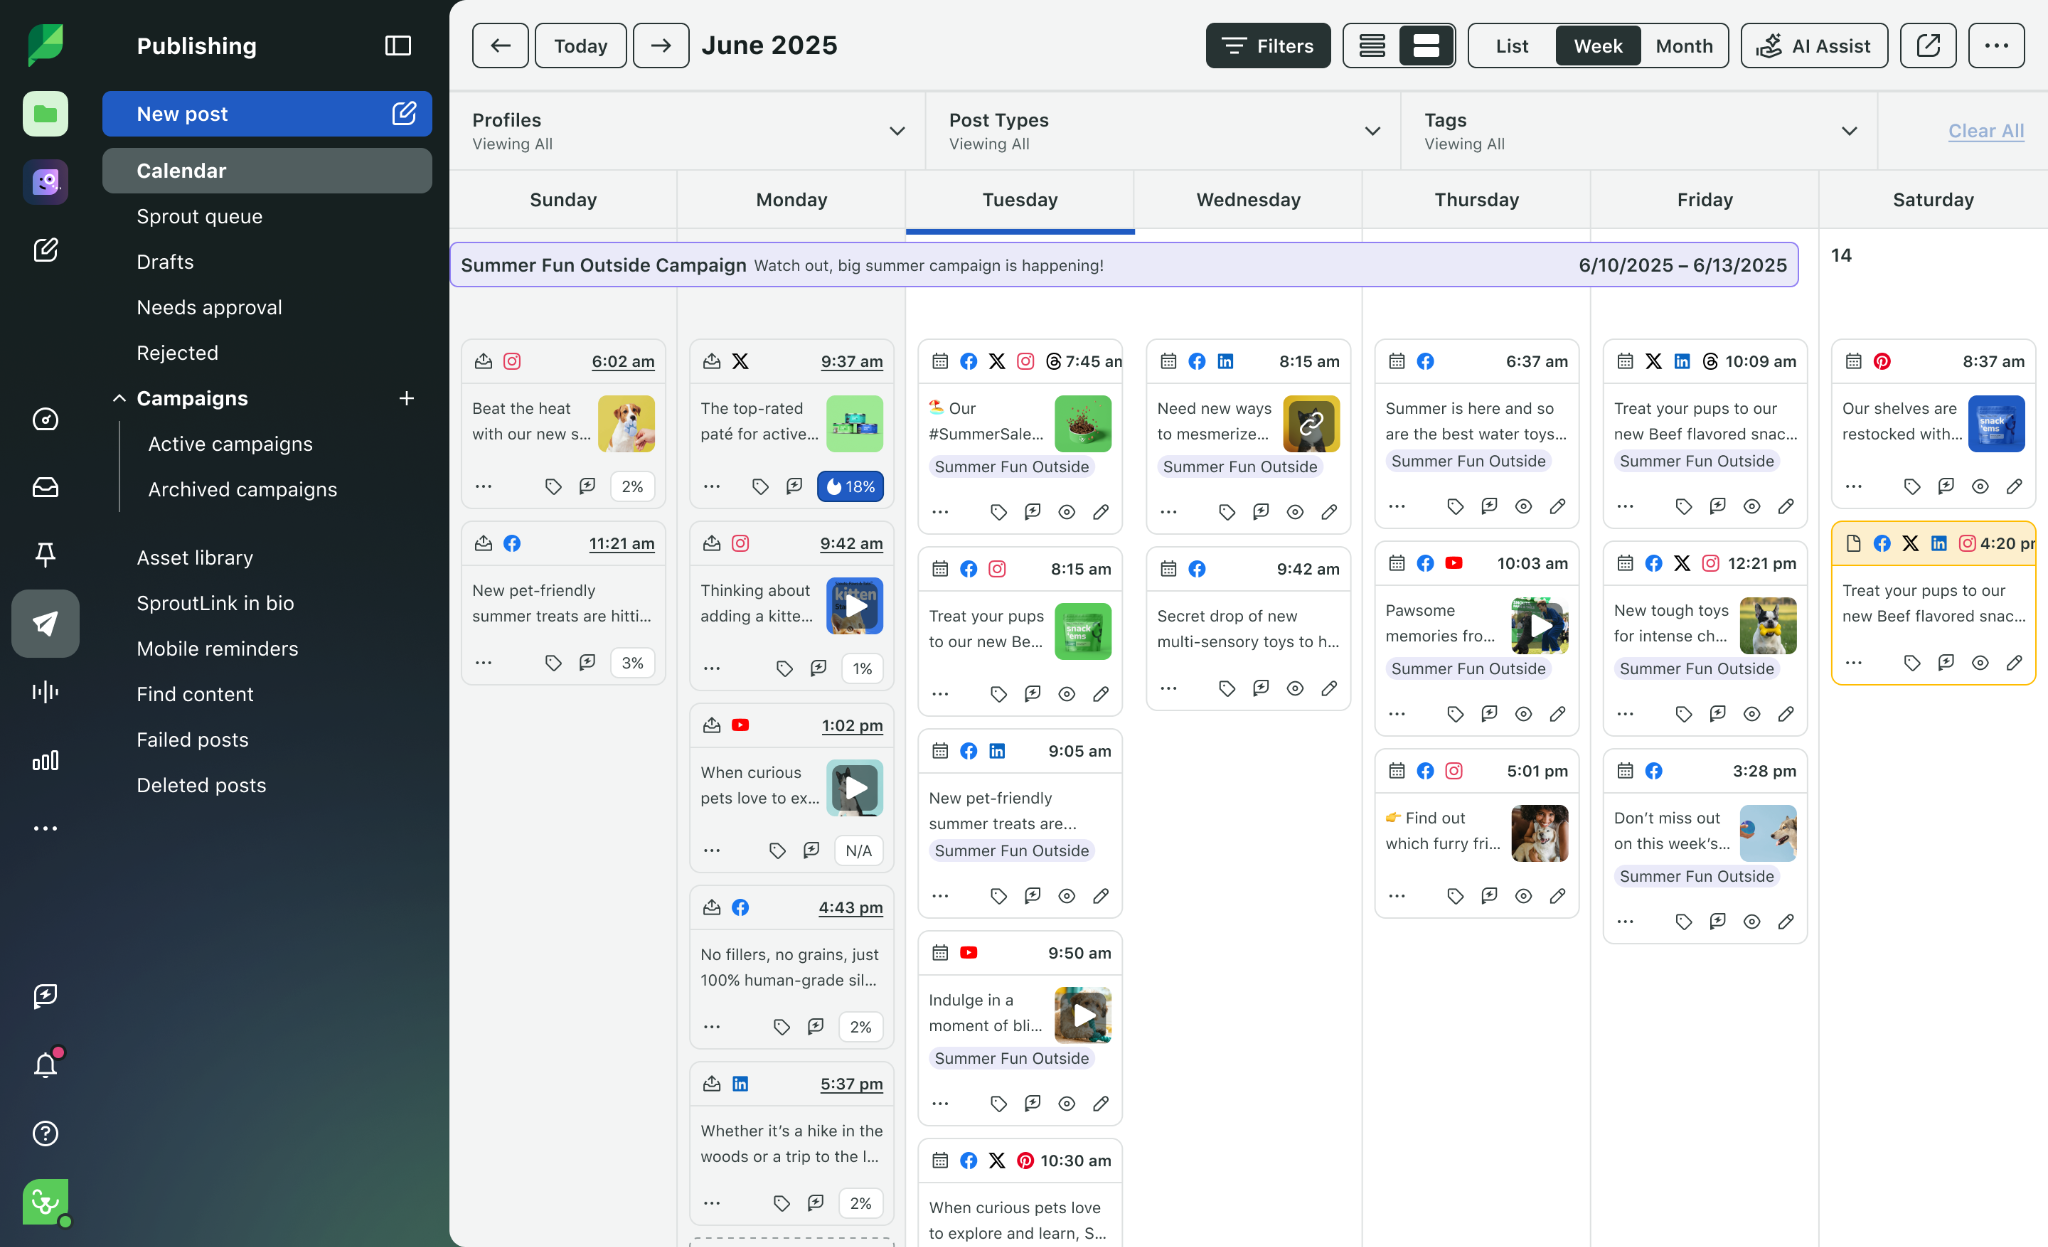
The platform will automatically publish the posts as scheduled!
Speaking of scheduling …
Step 3: Use the bulk scheduling tool
Bulk scheduling helps you post on social media platforms at scale.
One of the biggest bottlenecks when managing multiple accounts is content production at scale. Teams that repurpose written content into audio or short videos using text-to-audio tools can significantly reduce production time.
A single text post can be repurposed into multiple formats, such as TikTok videos or Instagram Reels, without starting from scratch, helping you keep up with short-form video trends while efficiently scaling content production.
You can upload many posts at once, plan when they go out, and let the tool publish them for you. It saves time and keeps your content running smoothly.

Once you have content prepared across formats, upload it in bulk to your scheduling platform. Then, schedule multiple posts at once to reduce manual work.
Here’s a typical workflow:
- Choose the social media account you want to post to from your dashboard.
- Upload your images or videos using your tool’s upload feature.
- Use the post editor to create a message that can be reused or adapted across posts. Or customize each one separately.
- Finally, set the date and time for each post, and save them to your editorial calendar.
Done!
Crosspost content to multiple social media accounts to maximize reach.
Just:
- Pick your main account: Choose one of your connected social media accounts where you want your post to go live.
- Create your post: Upload your photo or video from your computer, a URL, or a stock image bank. Add filters, write your caption, and include any hashtags you want.
- Add more accounts: Select additional accounts within your publishing workflow to distribute the same post across platforms. You can post to Instagram, Facebook, LinkedIn, X (Twitter), and more in one go.
- Tweak for each platform: Make small adjustments to fit each platform’s style. For example, shorten your caption for X or change the image format and size for Instagram.
- Schedule your post: Choose the date and time for each account. You can either post right away or schedule content in advance using your scheduling interface.
One more quick tip here before we head to step four. 👇
ALWAYS make sure your grammar is perfect before scheduling content to remain professional. (This is especially important if you’re planning content for clients.) Use a grammar checker as part of your social media marketing workflow, and make sure all social media managers have a login.
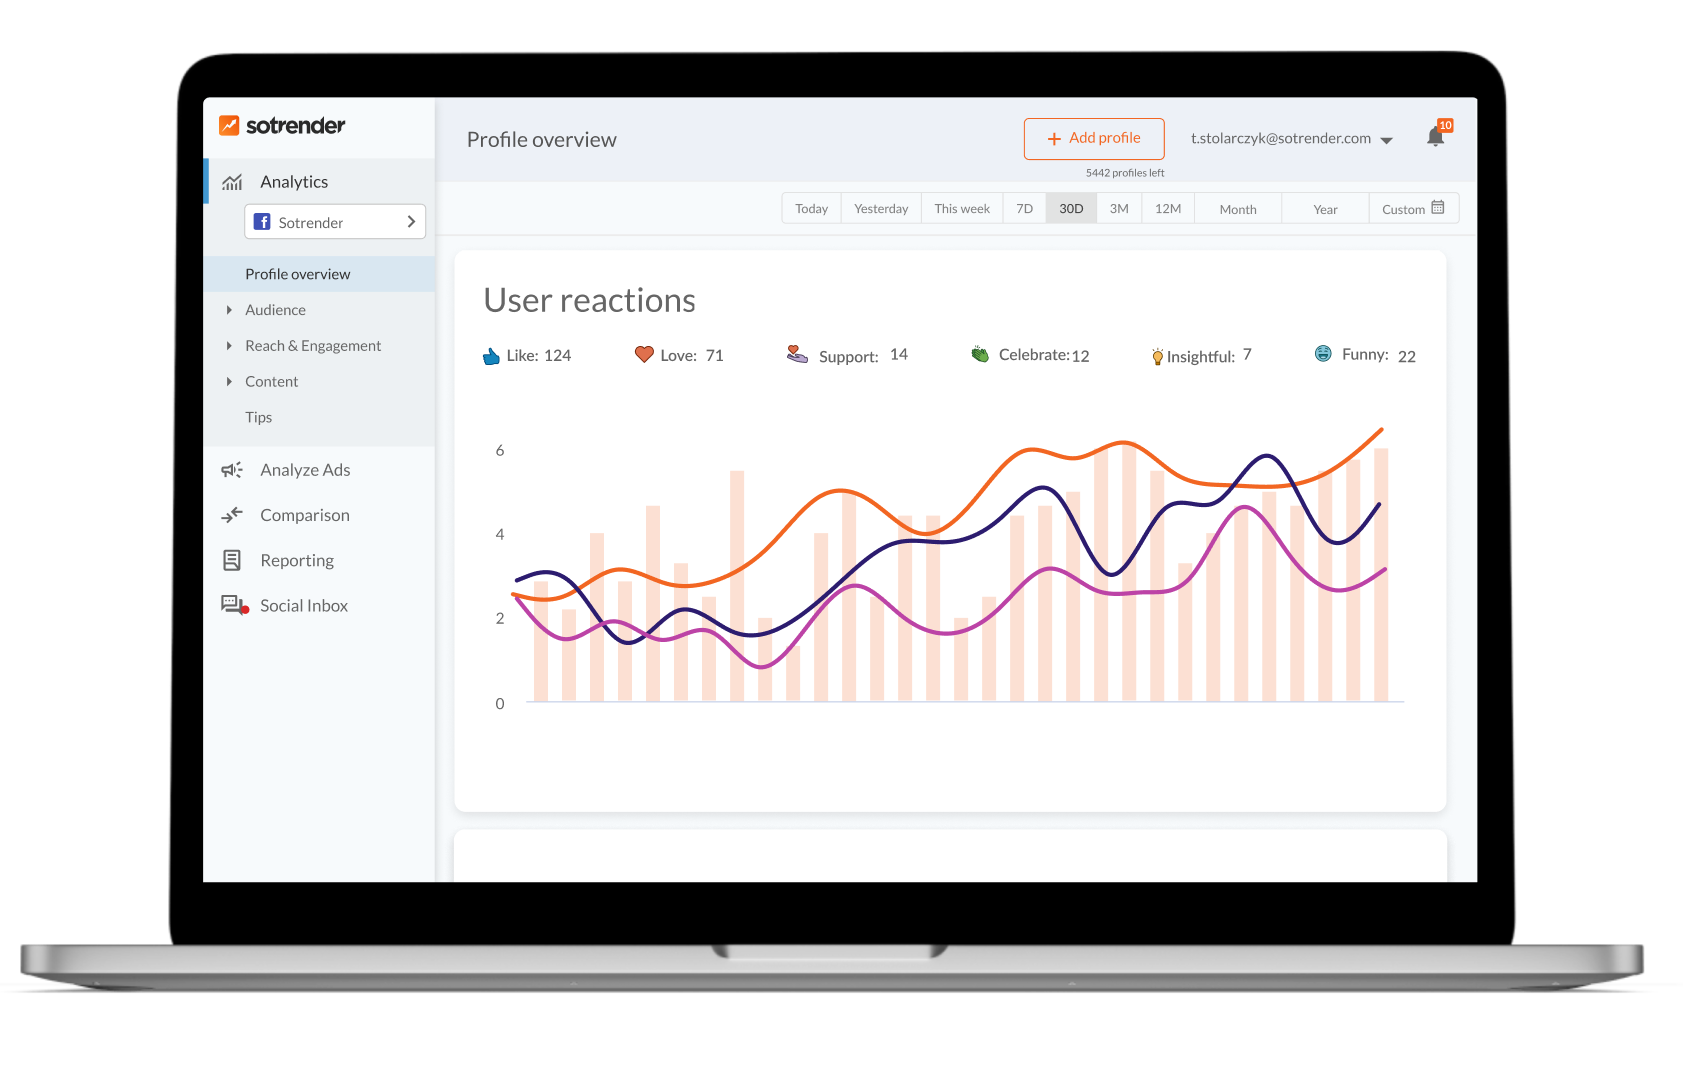
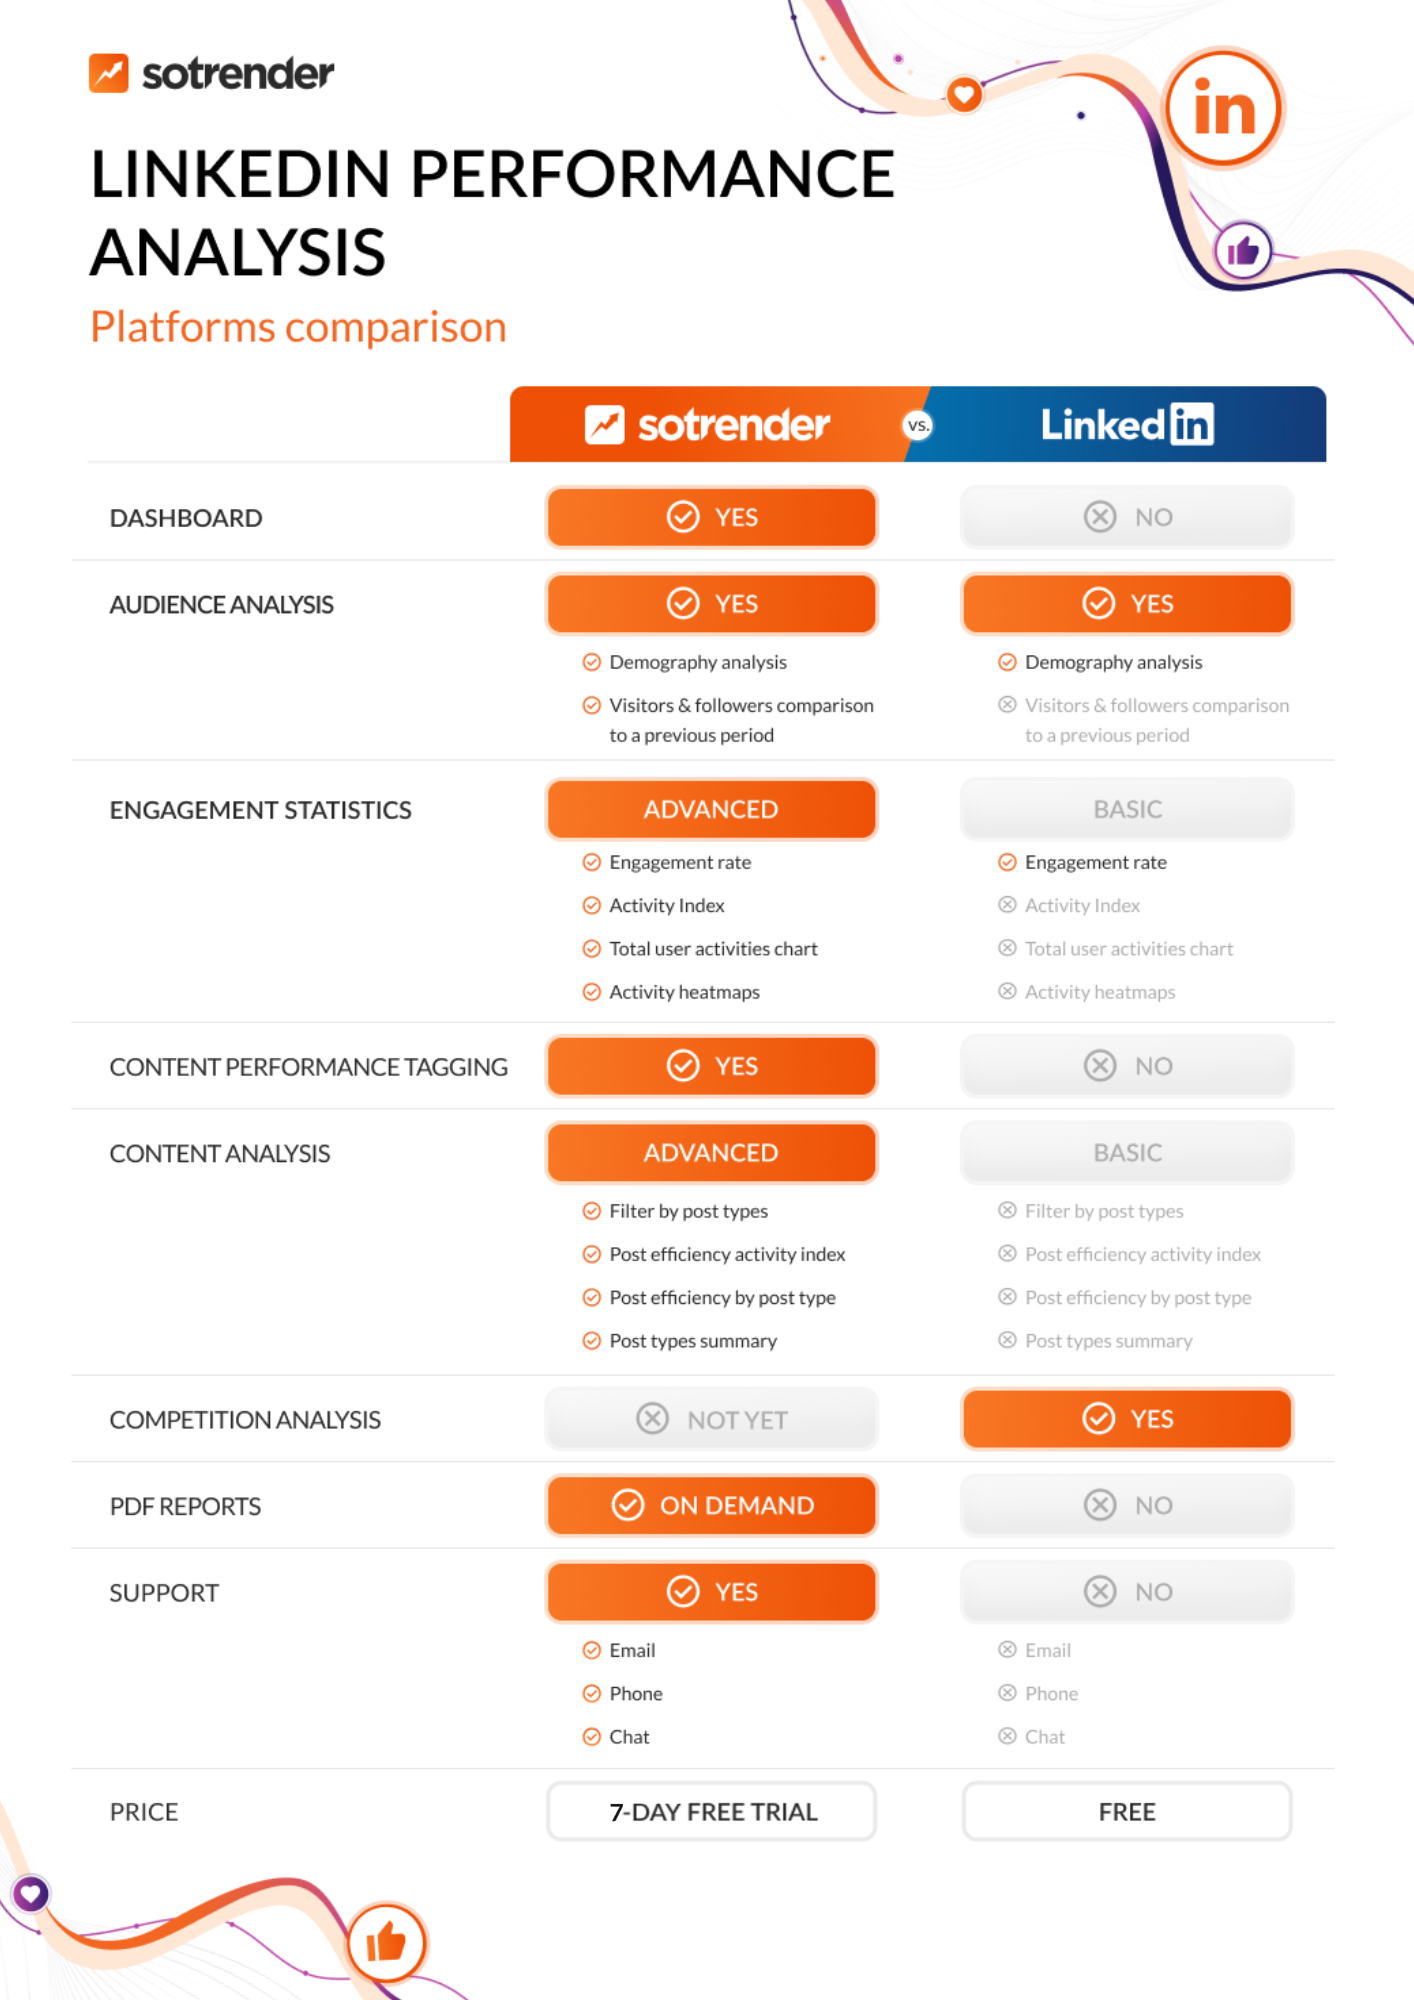
Tools like Sotrender play a key role in this workflow by giving you a unified view of performance across platforms. Instead of manually pulling data from each channel, you can track engagement, audience growth, and campaign results in one place.
This makes it easier to identify what content works and adjust your strategy based on real data rather than assumptions.
Step 4: Track Analytics Often And Refine Your Campaigns
Once your content is consistently going out, set aside time each week, month, and quarter to review analytics across your accounts using tools like Sotrender. Track engagement, identify what works, and re-post or repurpose winning content.
For example, if a travel company is promoting a Band of Brothers Battlefield tour that’s nearly sold out, performance data can show which platforms and formats are driving the most conversions. That allows the team to double down on what’s working while demand is still high.
Here’s how to analyze insights using an analytics platform:
- Open the analytics dashboard: Head over to your analytics dashboard to view performance across your accounts.
- Set your date range: Choose a time frame. View results by day, week, month, or even over several years.
- Track follower growth: See how your audience is growing or shrinking each day.
- Study your audience: Check your followers’ demographics: age, location, language, and when they’re most active online. This helps you post at the right time for the best visibility.
- Review post performance: Analyze which types of content (photos, videos, Stories, carousels) get the most likes, comments, shares, and clicks. Filter by content type to see what works best.
- Export branded reports: Generate reports to share performance insights with your team or clients.
What you’ll learn from analytics:
- How your average reach compares to your highest reach
- The average reach during the time period you picked
- How each post performs across different platforms
- What content works best for audience types
- Where your followers are located
- When they’re most active
- Total views on all posts
- And so much more
Step 5: Test and refine your workflow
Once your accounts are connected and your content is scheduled, take time to explore the tools you haven’t used yet. These extra touches can improve your posts and help you work faster.
For instance, you might …
Adjust your visuals to maintain a consistent look across platforms. If you’re uploading videos, experiment with custom cover images to boost clicks and align with your brand. You can also reuse existing posts across different accounts or time slots where possible.
You can also use dummy content to test how your posts look on different platforms. Try bulk uploading a week’s worth of posts, adjusting post times, and practicing customizing content per channel.
Practicing now by uploading bulk content, editing, and scheduling posts helps you move faster later. You’ll feel confident navigating your workflow, making tweaks and scheduling changes quickly without second-guessing.
Think of this as your “test-and-optimize” time before you scale your workflow.
Wrap up
Managing multiple accounts for your social media platforms doesn’t have to be messy. With a social media management tool, you can post faster, plan smarter, and keep everything organized — on one clean dashboard.
Follow the steps above to streamline your workflow, collaborate more easily, and stay consistent across platforms. Whether you’re managing five accounts or fifty, a structured workflow helps you stay in control and keep marketing efforts consistent.
Once your content is scheduled and running consistently, the next step is understanding what actually drives results. Tools like Sotrender help you analyze performance across platforms, identify what works, and generate reports without manual tracking.


